
The first was a name sign for my sister-in-law Jenni for Christmas. Each year we do a name draw between all the kids with a $30 limit so that we don't go broke, as our family expands. I also enjoy hand-making things so of course I started searching for a fun idea. I can no longer find the original link where I found this project but it's fairly simple.
The materials:
-a scrap piece of wood or cheap wood from Home Depot (I used one that's 1" thick so it can easily be hung from a wall or propped up)
-cheap picture frames
-a little paint (acrylic...either craft paint or paint samples from Lowe's/Home Depot)
-some printed out alphabet photos
-hot glue gun
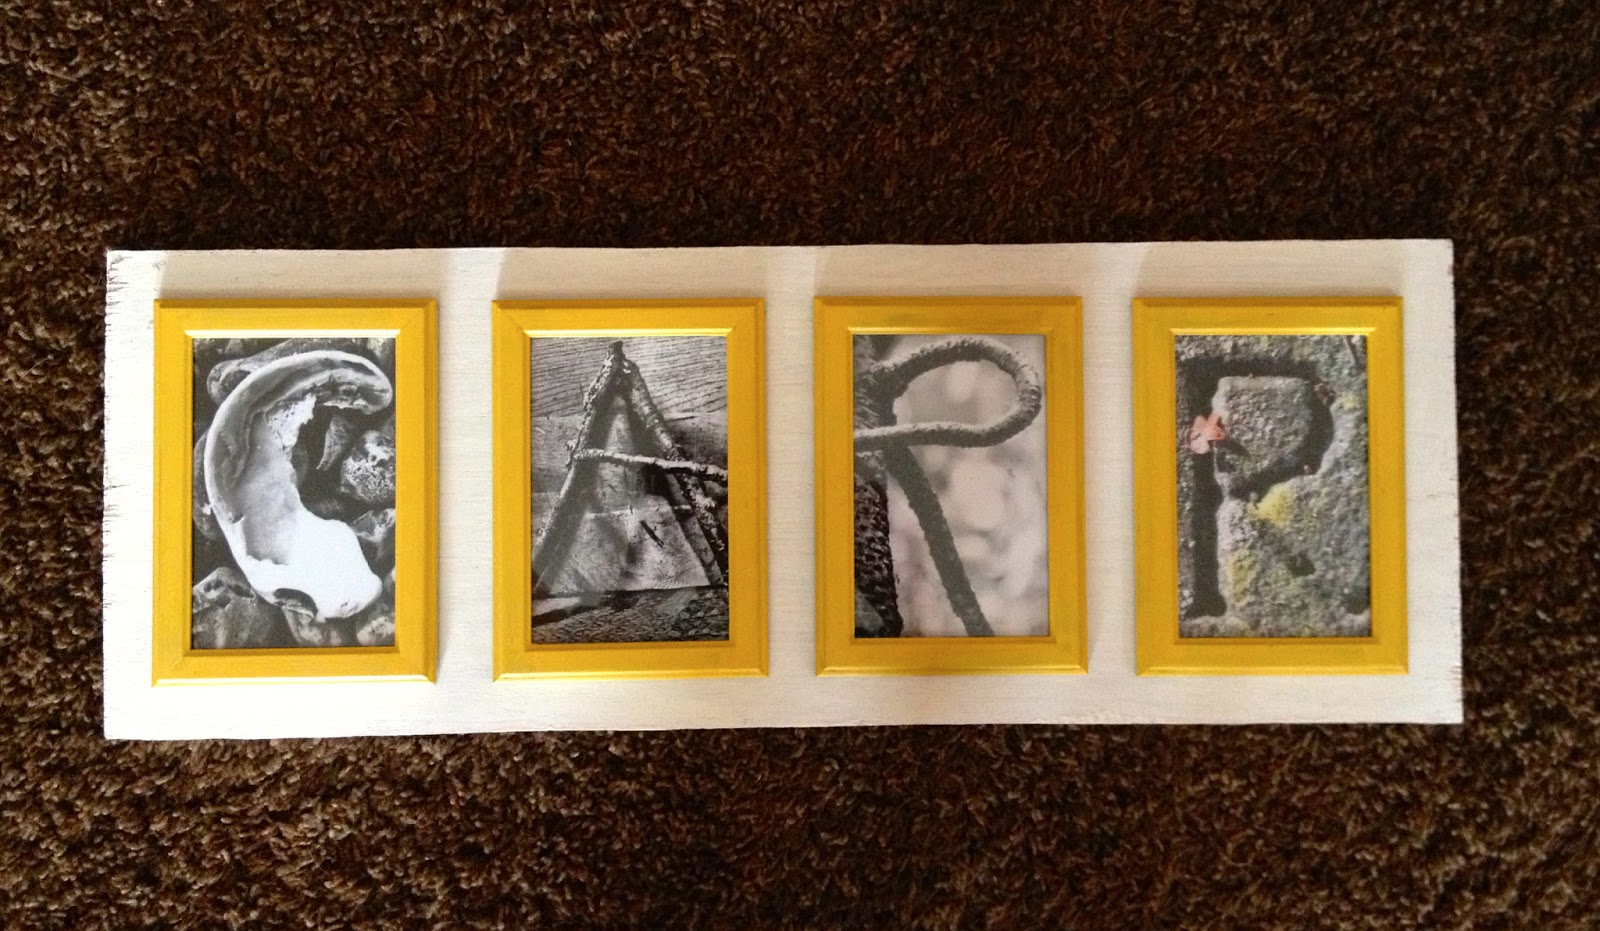
Because our last name is CARR, I bought four cheap photo frames costing $1 each from Wal-Mart. I removed the glass and backing to paint the frames the color I wanted (in this case a sunflower yellow), and then painted my scrap piece of wood (which I cut to the dimensions in length and width of how I wanted it to be proportioned. I then applied the glass and photos to the frames (gentle removing that little stand/partition from the back), and then glued the frames to the wood. Voila, easy and cheap project!! I did not apply the wall hangers to the back, as I wanted them to choose how they wanted to display it but those can be bought at any hardware store for about $1-$2 bucks, easily applied with a screwdriver and then hung onto the wall!!

My next project was for myself and I found it here at Color Me Glamorous. She has some really neat projects but given my obsession for mason jars and a need for a new lamp, I wanted to give it a go :-) I found some teal mason jars at a thrift store in Fort Collins ($5/each), the lampshade was on sale at Target awhile back for $4, and the lamp kit was $10 at Lowe's. To make this, simply follow her tutorial. You will need a drill and a glass drill bit (which can be purchased for ~$7 at Lowe's/Home Depot). When I was done, I added a little bit of colored rocks we had sitting around into the jar and voila, a brand new, fun, and unique lamp!!


My last project was a little bit more lengthy and included me really learning how to use a sewing machine! While I have used it in the past to make pillows, I had never used it to THIS extent before. Not to mention I also learned how to do the zig-zag pattern, and how changing the settings applies to the bobbin, presser foot, etc. Might I also add I was using my mom's sewing machine which is a full decade older than I am!! You can find the tutorial here at You're So Martha. She also has some great projects and I will readily admit, this one is pretty simple and she explains it SO well. So just head over there.
Anyway, my parents are Harley Davidson lovers. They get us t-shirts from Sturgis, Daytona Bike Week, and other biker occasions all the time. My brothers grow out of them or wear them out. So we decided to use all those shirts (plus some from thrift stores and some cheap bids from ebay) on one side, and then I got a piece of felt (on clearance from Joann Fabrics ~$5 for 8 yards!) to go on the back. I simply cut them to the dimensions I wanted (15"x15" as we wanted a huge blanket), and followed the tutorial instructions. The most intensive part was the amount of pinning that had to be done and redone on a blanket this side. Either way, it came out beautiful and my dad loves it. He has it laying on HIS side of the bed though it was for both of them. What a really cool way to personalize a gift...by hand-making something of meaning. Adds that little something extra special to the project!!

The stack of t-shirts before I began cutting them with my template.

Determining my layout before I started pinning the blanket.

The finished project...sorry it's blurry, it was a quick camera picture before I had to hurriedly wrap it. Covert blanket operation was in full effect to finish it while my parents were at dinner one night.
No comments:
Post a Comment