Showing posts with label DIY. Show all posts

Wednesday, February 27, 2013

Jewelry Holder and Picture/Memo Board

A few more projects that I was able to finish:

The first one was a couple of picture/memo boards that I made after finding the idea/tutorial here at Shanty-2-Chic. Really easy and really simple to make :-) I actually made two of them, one for my sister-in-law and one for a co-worker.

 This is the one I made for my sister-in-law. She loves the brilliant colors (too bad the clip ended up covering the peacock face...)
Both finished products.
Another view....one thing I wish I would have done is distressed them a bit more...I figured that they will probably get distressed enough on their own but I should have sanded them down a wee bit.


The next project that I did was to make a jewelry holder for the same sister-in-law. There is no tutorial for this one (and unfortunately I didn't take pictures as I went). However it was really simple. 
Here's what you need:
-an old picture frame (hello thrift stores!) 
-cup hooks
-chicken wire mesh
-staple gun
-small pieces of cloth (optional)

I tried to duplicate the crackle finish from Shanty-2-Chic. The crackle did not work too well, at least not what you can see in the pictures, but if you see it in person up close you can see some. I just think I didn't do it right. 

Once that was finished I cut out the appropriate size of the chicken mesh and then stapled it to the frame. Lastly I painted and screwed in the cup hooks around the frame to provide a way to hang necklaces and other jewelry. (Earrings are hung on the chicken mesh). I rooted a few holes with a drill bit and then simply screwed the cup hooks into the holes. Easy peasy! 

Here's the finished product. 


Sneak peak of my next project:

Sunday, January 27, 2013

DIY - Mason Jar Lamp, T-shirt Blanket, Letter Photography Frame

One of the best parts of being done with that crazy accelerated nursing program was I was able to get a few projects done. Two were Christmas presents and the other was something for my own room. Of course, I can't take credit for any of these projects, I am a DIY blog junkie who loves to find inspiration and projects from all over the interwebs.

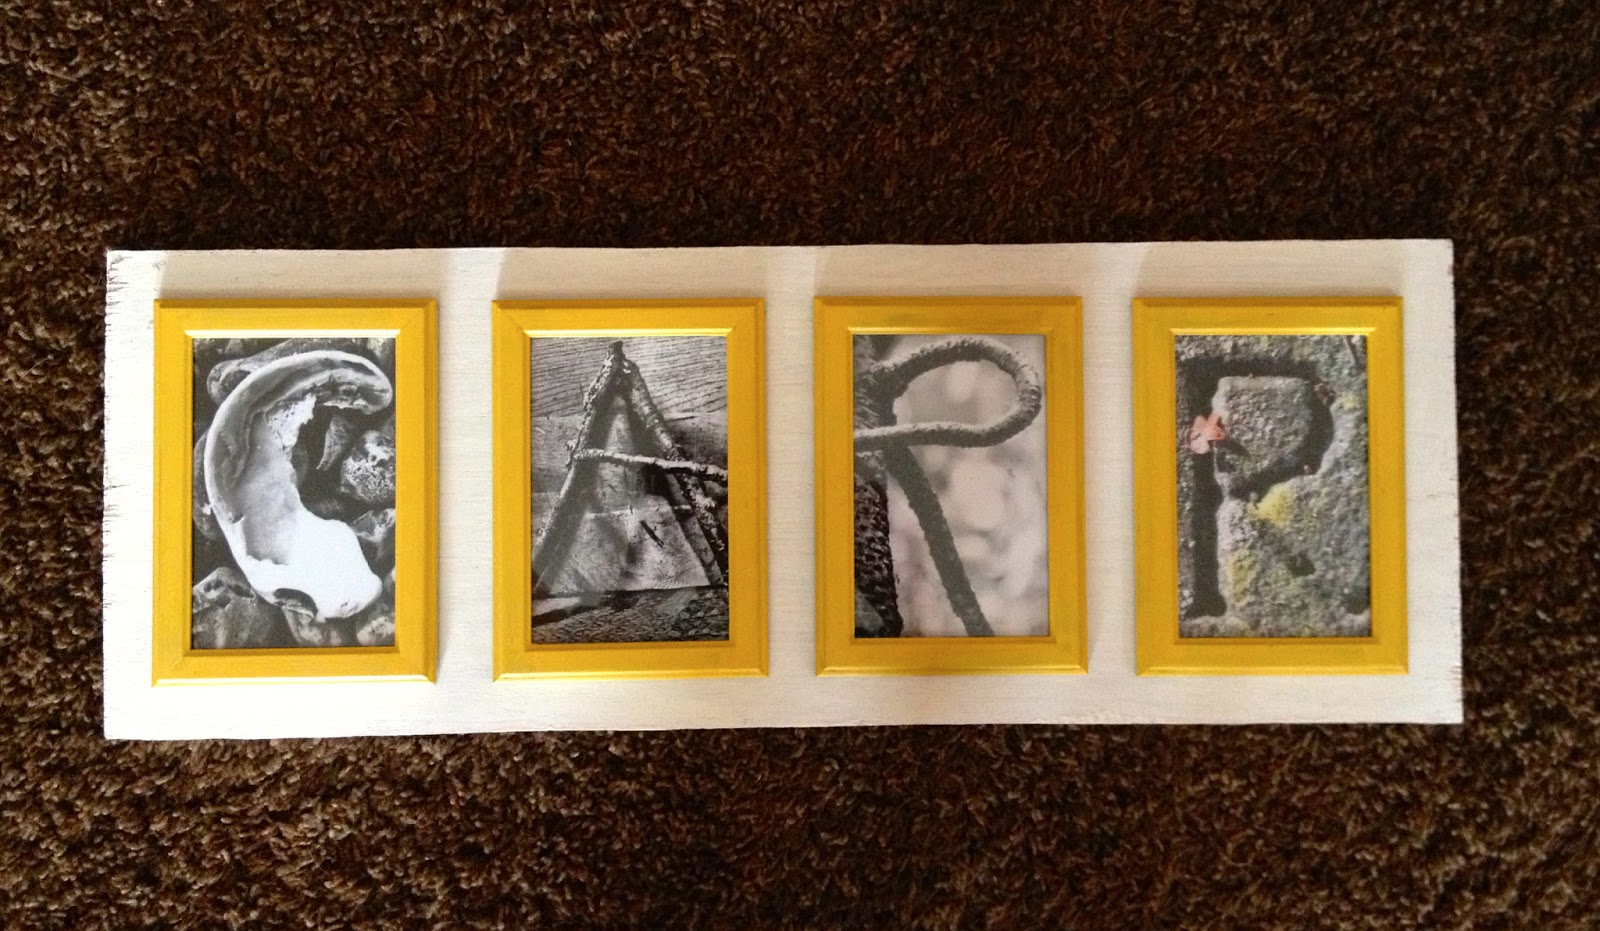
The first was a name sign for my sister-in-law Jenni for Christmas. Each year we do a name draw between all the kids with a $30 limit so that we don't go broke, as our family expands. I also enjoy hand-making things so of course I started searching for a fun idea. I can no longer find the original link where I found this project but it's fairly simple.

The materials:
-a scrap piece of wood or cheap wood from Home Depot (I used one that's 1" thick so it can easily be hung from a wall or propped up)
-cheap picture frames
-a little paint (acrylic...either craft paint or paint samples from Lowe's/Home Depot)
-some printed out alphabet photos
-hot glue gun

Because our last name is CARR, I bought four cheap photo frames costing $1 each from Wal-Mart. I removed the glass and backing to paint the frames the color I wanted (in this case a sunflower yellow), and then painted my scrap piece of wood (which I cut to the dimensions in length and width of how I wanted it to be proportioned. I then applied the glass and photos to the frames (gentle removing that little stand/partition from the back), and then glued the frames to the wood. Voila, easy and cheap project!! I did not apply the wall hangers to the back, as I wanted them to choose how they wanted to display it but those can be bought at any hardware store for about $1-$2 bucks, easily applied with a screwdriver and then hung onto the wall!!


My next project was for myself and I found it here at Color Me Glamorous. She has some really neat projects but given my obsession for mason jars and a need for a new lamp, I wanted to give it a go :-) I found some teal mason jars at a thrift store in Fort Collins ($5/each), the lampshade was on sale at Target awhile back for $4, and the lamp kit was $10 at Lowe's. To make this, simply follow her tutorial. You will need a drill and a glass drill bit (which can be purchased for ~$7 at Lowe's/Home Depot). When I was done, I added a little bit of colored rocks we had sitting around into the jar and voila, a brand new, fun, and unique lamp!!


My last project was a little bit more lengthy and included me really learning how to use a sewing machine! While I have used it in the past to make pillows, I had never used it to THIS extent before. Not to mention I also learned how to do the zig-zag pattern, and how changing the settings applies to the bobbin, presser foot, etc. Might I also add I was using my mom's sewing machine which is a full decade older than I am!! You can find the tutorial here at You're So Martha. She also has some great projects and I will readily admit, this one is pretty simple and she explains it SO well. So just head over there.

Anyway, my parents are Harley Davidson lovers. They get us t-shirts from Sturgis, Daytona Bike Week, and other biker occasions all the time. My brothers grow out of them or wear them out. So we decided to use all those shirts (plus some from thrift stores and some cheap bids from ebay) on one side, and then I got a piece of felt (on clearance from Joann Fabrics ~$5 for 8 yards!) to go on the back. I simply cut them to the dimensions I wanted (15"x15" as we wanted a huge blanket), and followed the tutorial instructions. The most intensive part was the amount of pinning that had to be done and redone on a blanket this side. Either way, it came out beautiful and my dad loves it. He has it laying on HIS side of the bed though it was for both of them. What a really cool way to personalize a gift...by hand-making something of meaning. Adds that little something extra special to the project!!

 The stack of t-shirts before I began cutting them with my template.
Determining my layout before I started pinning the blanket.
The finished project...sorry it's blurry, it was a quick camera picture before I had to hurriedly wrap it. Covert blanket operation was in full effect to finish it while my parents were at dinner one night. 


Sunday, December 23, 2012

Finished Vanity!

While we finished this project ago, I've forgotten to post the finished product. We finished it at my last break, so that was approximately 17 weeks ago. Oh well.

Our original plans were to go get a granite countertop with a bowl sink and this awesome rustic farmhouse spicket-looking faucet. My parents also decided to list their house at that time and it wasn't worth the money to spend that to then turn around and sell the house and the next owners get rid of it (needless to say, I'd be pissed knowing they also got rid of the vanity seems as how I put so much hard work and time into it!). So we decided to get a pre-fabricated sink that (mostly) matched our original ideas and put the faucet back in that had been in the old antique vanity sink.

Without further ado, here is the finished product. I also got a nice little lesson from my faja in how to hook a sink back up ;-)

 Dad and I putting putty in the sink and applying the "backsplash"

 The not-so-original idea sink
 Dad with the finished product
The finished product....LOVE IT!!!

A few more DIY projects will be coming after Christmas....since I made them as Christmas gifts ;-)

Sunday, September 23, 2012

Vanity/Highchair DIY

It's taken me a little while to get this blog post up d/t the demands of nursing school as of late.

As of late, Med/Surg II has eaten pretty much ALL of my time, and I've spent more time studying than ever before.

However, on the week we had off I had a chance to work on the vanity project with my dad and get it almost completely finished. I was also able to make a necklace holder (thank you pinterest for the inspiration). I was also able to get the highchair finished.

Here's the pics with the explanations of what all we did!

I found some gems at a thrift store right before I started nursing school. We were walking through one of the Denver thrift stores when I happened to find this awesome vintage highchair just chilling among the furniture. I swooped it up, with my brother and sister-in-law expecting, thinking it would prove to be an awesome piece! However, it was a color that leaves a ton to be desired.

While it wasn't bad, yellow with golden accents isn't exactly my style. 
Just a peek at what it looked like before...

The first break we had from nursing school, I stripped the paint off of the chair with paint stripper. My pieces of advice: wear long sleeves and pants and make sure you have an awesome stripping tool!

after pain stripping

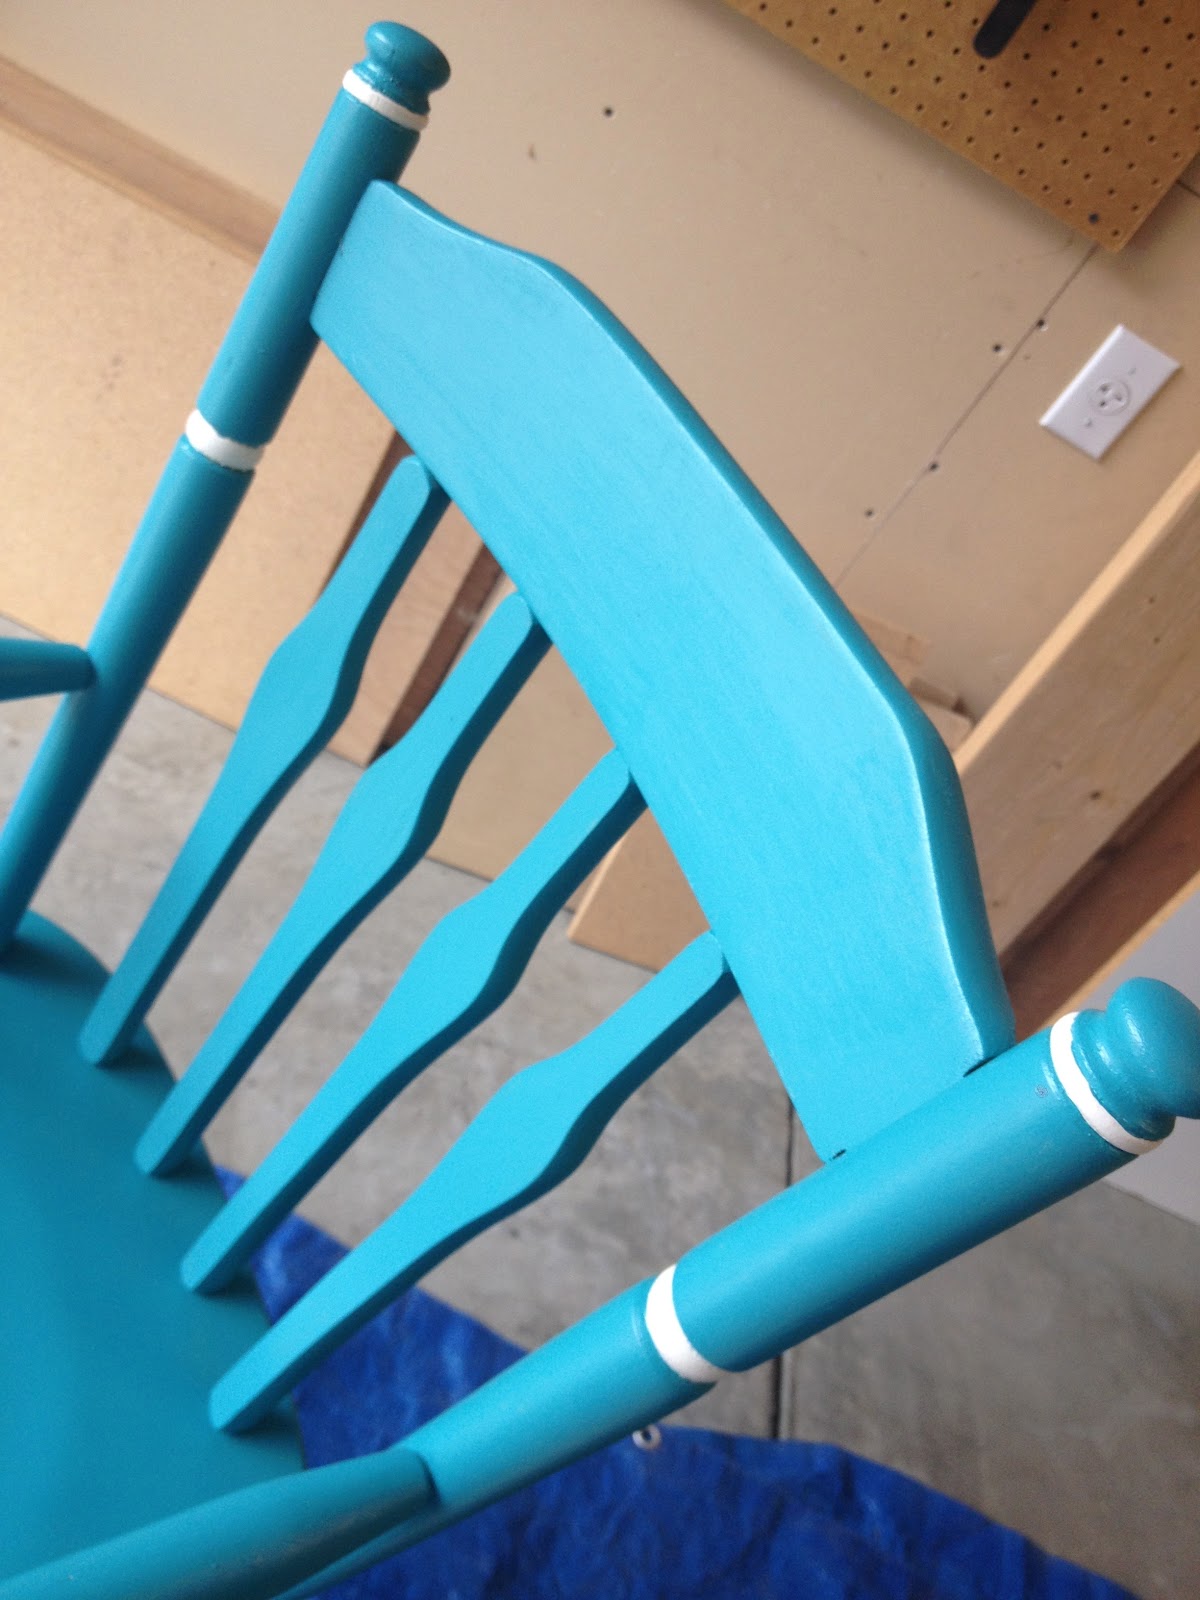
After the paint stripping, it still needed to be sanded down to get the loose paint off and in the nooks and crannies. I also used toothpicks to get in the round details. I recommend blowing it off with an air compressor or the like once done with that. Then it was on to painting. I initially wanted to do a weathered look but my mom (aka grandma) wanted a crisp look. She also wanted to do white but I wanted to add some color, so I chose this color. It's Schooner Blue from the Olympia line. I got it at Lowe's :-)
I chose the dry brush stroke method, to give it a little imperfection. Which meant I had to apply two coats and meant it took longer than just slothering it all over. I also took a small acrylic brush from Michaels to do the white decorative rings. All in all it came out really nice and I love it!! However, I'll probably be the last person in our family to have children ;-) 

 without any filters and with overhead lights in the garage on
The finished product

The next project was a quick necklace holder, inspired by projects found on pinterest. My father was replacing the front fence and gate so I salvaged some wood for my project, one of the old weathered beams. I got the teal knobs on sale and the clear/bubbly ones for full price at anthropologie. Simply, I pilot drilled the holes and counter-sank a small recess into the wood....or should I say my father helped me to do so :-) The we screwed the jigsaw picture-frame holders on each side of the back to hold it up on the wall. It's bigger than most that I've seen on pinterest...but I didn't want to alter the wood at all, simply sand it down a little to get the rough splinters off. I loved the weary-ness of it and didn't want to ruin that by sawing it off at the end. 


We also finished up the vanity, which I never blogged about. This we made from scratch. My mom found a simple plan she liked, my father figured the dimensions, and we set off to work. This project overall took two weeks to finish (and still isn't completely finished as we haven't fully set it up stairs and put the counter on). We used a raw cherry wood, in which we rabbit holed the pieces together by a pilot drill with a counter-sink. We were going for a more farmhouse feel. Simple yet farmhouse. Once all together, I used Minwax Special Walnut wood stain (two coats applied thickly with a brush and then wiped with a clean cloth), followed by two coats of Minwax Polyurethane.

the hardware looks like this, though I couldn't find the exact cabinet pull on the website 
 
  As for the process, here is a quick montage of the project up until we need to put the sink on ;-) 

 a lot of wood glue and clamps were involved in this project

 after the first coat of stain

after the second coat of stain, the two coats of polyurethane and the hardware application

Once we get the sink and faucet hardward installed I post the FINAL picture of the vanity. Also mad props to my faja (aka pops) as he was the one who mainly did everything. I provided moral support, physical support, and my common smartass comments during the entire project. And of course, the expert wood glue applier and excess wiper ;-) 
Once I'm done with nursing school, I'm sure we have more projects lined up but until then, my only other projects include a canvas and paintbrush. I'll also post that project once it's done.

Sunday, April 29, 2012

Refurbished Cradle

This past week, I refurbished our old cradle. My brother Marshall and his wife are expecting their firstborn here in ~5 weeks. Baby Thor. We don't know what they are naming their child (it's a surprise) so he will forever be my little Thor :-) Anywho, this is the cradle that my parents had for my brother's Kevan and Reece. After years of it being in storage, with the announcement of the arrival of the first grandchild, it was pulled out. This week I refurbished it. I filled the cracks on top with wood filler, sanded her down, and then stained her.

 Workin on the cradle
 That sander and I are becoming fast friends!
 Wood filler on the cracks

After hours of sanding, I thought maybe I had the finish off. Alas when I started staining I found out very quickly that I hadn't indeed taken the finish completely off (one can tell this by whether the wood absorbs the stain or rather it gets pushed around and around on top). Either way I found a technique to try to darken the stain without sanding it back down. I'd put the stain on with a foam brush and let it dry for 20 mins, then wipe it off with a clean old rag. The coolest part was that the stain wasn't absorbed well in the bigger areas where I couldn't get the finish off but the edges were well sanded and absorbed the dark stain very well!! Overall the wood looks mismatched which gives it a really cool rustic look. I love the way it turned out!! Now just need to find or make a mattress for it and await Baby Thor's arrival :-)

 The finished product
The other side of the cradle :-) you can definitely see the contrast 

The other projects that I've finished are painting a side table, doing some hand-dipped vases (which by the way, those tutorials on other blogs don't explain just how hard it is to get the paint even and looking nice), and finishing up some decorative pillows. 

Next up on my list: refurbish an old highchair, build a baby blanket, and build a vanity!

Saturday, December 31, 2011

Reupholstered Chair

I finished another DIY project...I upholstered the chair that came with my desk. For this project, I was originally going to sand and stain the wood, and simply replace the fabric. HA! For the frame, I decided to steel wool it and then spray paint it with a darker brown matte spraypaint. When I took the fabric off the seat, I realized the original fabric was also still on it, underneath the ugly plaid (it was an even uglier orange). I also realized that when someone had reupholstered and reapplied the chair bottom, the screw holes were side by side, leaving me with a high chance of stripping the screw holes and/or splitting the old wood. Therefore my dad helped to trace out a new bottom on which we got new foam, and cut a new funky indoor/outdoor fabric I scooped up from Joann fabrics. Here's the pics of the process and final product :-) 
the chair before
 spray painting the frame
 fabric and new chair bottom
 chair bottom once finished upholstering
 trying to get a shot of the spraypaint finish
 the finished chair!
 did i mention it was a folding chair?!!?

Tuesday, December 27, 2011

My Finished Side Tables!

I finally finished my side tables!! It took me awhile thanks to doing a bunch of killer overtime. However, I finally have them (almost completely) finished! Here's some pics of the process :-)


The only thing left is the polyurethane coat on top to protect in case drinks or whatever are placed on it. But they are currently in the garage drying. Once they are in use I'll take a pic and show what they look like actually being put to use but that will have to wait until I move to my new place. I have quite a few other projects I'm working on. I'll post those once I have finished :-)